

I’ll be completely honest with you I walked past Anasazi beans at the store more times than I can count before I finally picked up a bag.
I didn’t know what they were. I just knew they were pretty.
That was a mistake I spent way too long making. Because once I cooked my first pot of these speckled, creamy, impossibly sweet little heirloom beans I couldn’t believe I’d been sleeping on them for so long.
Anasazi beans are one of the oldest cultivated foods in all of North America. They cook faster than most beans, they’re dramatically easier on digestion, and the flavor? So much richer and sweeter than a pinto that it genuinely felt unfair.
Today I’m walking you through everything. The real history behind these beans, the best soaking and cooking methods for every schedule, AND my signature Creamy Anasazi Beans recipe finished with a fragrant Indian-inspired tadka that will absolutely stop people mid-conversation to ask what you’re cooking.
No fancy equipment needed. Just a pot, good spices, and about an hour.
Let’s get into it.
What Are Anasazi Beans? (The History & Origins)
Before we talk cooking, we need to talk history because these beans have a genuinely fascinating backstory.
The “Cave Bean” Legend vs. Reality
You’ve probably come across some version of the cave bean story.
Ancient clay pots discovered in a cliff dwelling. Sealed with pine tar. Beans found perfectly preserved inside. A few of them sprouted after being dormant for over a thousand years, and somehow became the commercial seed stock we know today.
It’s a wonderful story. It’s also been told about a dozen different ways by a dozen different people, with wildly different details depending on who’s telling it different mountains, different decades, different families.
The truth is more layered and, honestly, just as fascinating.
What we do know with certainty is that the Ancestral Puebloans the civilization that thrived across the Four Corners region of the American Southwest from roughly 300 BCE onward were cultivating beans, corn, and squash together as a core part of their agricultural system. These people built the cliff dwellings at Mesa Verde and the great houses of Chaco Canyon. And beans almost certainly including the ancestors of what we now call Anasazi beans were a staple in their diet for centuries.
The commercial name “Anasazi Bean” came much later, trademarked by a family business in Dove Creek, Colorado. But the beans themselves? That heritage goes back over 1,500 years.
One quick note: “Anasazi” is a Navajo word that translates roughly to “ancient ones” or “ancient enemy.” Many modern Pueblo peoples who are direct descendants of that civilization find the term disrespectful and prefer “Ancestral Puebloan.” Worth knowing, and worth respecting.
Appearance: From Speckled “Appaloosa” to Pale Pink
Raw Anasazi beans look like tiny works of art. They’re a creamy white base with bold burgundy-red speckles that remind you of an Appaloosa horse which is exactly why they’re sometimes called Appaloosa beans, or Aztec beans, or New Mexico cave beans, depending on where you shop.
Here’s the fun part nobody warns you about: those gorgeous speckles fade when you cook them.
The color comes from natural pigments called anthocyanins, which are heat-sensitive and water-soluble. Once the beans hit hot liquid, those pigments leach right out into the cooking water leaving your beans a soft, dusky pinkish-cream color.
Don’t panic. It’s completely normal. It’s not a sign that something went wrong. It’s actually your visual cue that the beans are cooked through and ready to eat.
The flavor is unaffected. The texture is unaffected. Your beans are perfect. They just changed outfits. 😄
Why You Should Swap Pintos for Anasazi Beans
Pintos are a classic. I love a good pinto. But Anasazi beans do everything a pinto can do and then quietly, confidently, do it better.
Sweeter Flavor & Creamier Texture
The flavor difference is noticeable from the very first bite.
Anasazi beans have a naturally sweet, mildly nutty, slightly earthy taste that makes plain pintos feel kind of flat by comparison. The interior, once cooked, is buttery and smooth almost like the texture of a well-cooked potato which makes them incredibly satisfying even without a lot of added seasoning.
They cook faster than most beans too. Even soaked pintos can take 90 minutes or more. Anasazi beans? About 45–60 minutes on the stovetop after soaking. That’s a real difference on a weeknight.
Anywhere you’d reach for pintos, kidney beans, or great northern beans Anasazi beans can step right in. And they’ll probably steal the show.
The Digestion Benefit (75% Less Gas-Producing Oligosaccharides)
Okay, we’re going there. Because it matters! 😄
Most beans cause digestive discomfort because they contain oligosaccharides a type of complex carbohydrate that the human body doesn’t fully break down on its own. Those undigested carbs ferment in the large intestine, and you already know what happens next.
Anasazi beans genuinely stand apart here. They contain roughly 75% fewer of these gas-producing oligosaccharides compared to other common dried beans.
That’s not a small difference. That’s a life-changing difference for anyone who loves beans but has learned to be strategic about when and how much they eat.
They’re not completely gas-free no bean is but for people who find most beans hard on their system, Anasazi beans are absolutely worth trying first.
Do You Need to Soak Anasazi Beans?
Short answer: you don’t have to.
Longer answer: please do it anyway especially if you’re going for that ultra-creamy, melt-in-your-mouth texture.
Because Anasazi beans are smaller with thinner skins than larger beans like chickpeas or kidneys, they cook reasonably well even without soaking. But a proper soak makes a meaningful difference: more even hydration, better texture, faster cook time, and even easier digestion.
You have two solid options:
The Overnight Cold Soak Method
This is my go-to whenever I’m planning even a little bit ahead.
Put your rinsed, sorted beans in a large bowl and cover them with at least 3 inches of cold water they’ll expand more than you expect, so be generous. Leave them on the counter for 8–12 hours or overnight.
Drain completely and rinse well before cooking.
The result is beautifully hydrated beans that cook evenly, hold their shape, and have that creamy, velvety interior we’re going for.
The 1-Hour Quick Soak Method
Forgot to soak last night? This is your plan B and it genuinely works.
Add your rinsed beans to a pot and cover with a few inches of cold water. Bring to a full rolling boil and let it boil hard for 2 full minutes. Remove from heat, cover, and let the beans rest undisturbed for 1 full hour. Drain, rinse well, then cook as normal.
It’s not quite as effective as the overnight soak for creaminess, but it’s miles ahead of skipping the soak entirely.
How to Cook Anasazi Beans (Master Timings)
Here’s one of my favorite things about Anasazi beans you have complete flexibility in how you cook them.
Busy morning? Slow cooker. Weeknight dinner? Stovetop. Forgot to plan ahead entirely? Instant Pot, no soak needed, dinner still happens.
All three methods work beautifully. All three give you slightly different results. And all three are going to make your kitchen smell absolutely incredible while they’re happening.
Pick the method that fits your day and let’s get cooking.
One golden rule that applies to every single method:
Never and I mean never add salt, tomatoes, lemon juice, vinegar, or anything acidic to your beans until they are completely, fully tender.
Acid and salt interact with the outer skin of dried beans at a chemical level and can toughen them, trapping the interior and making them resistant to softening no matter how long you cook them. I have ruined a beautiful pot of beans this way before. It’s a sad, sad day. Add all your seasoning only after they’re done. You’ve been warned! 😅
Now let’s get into it.
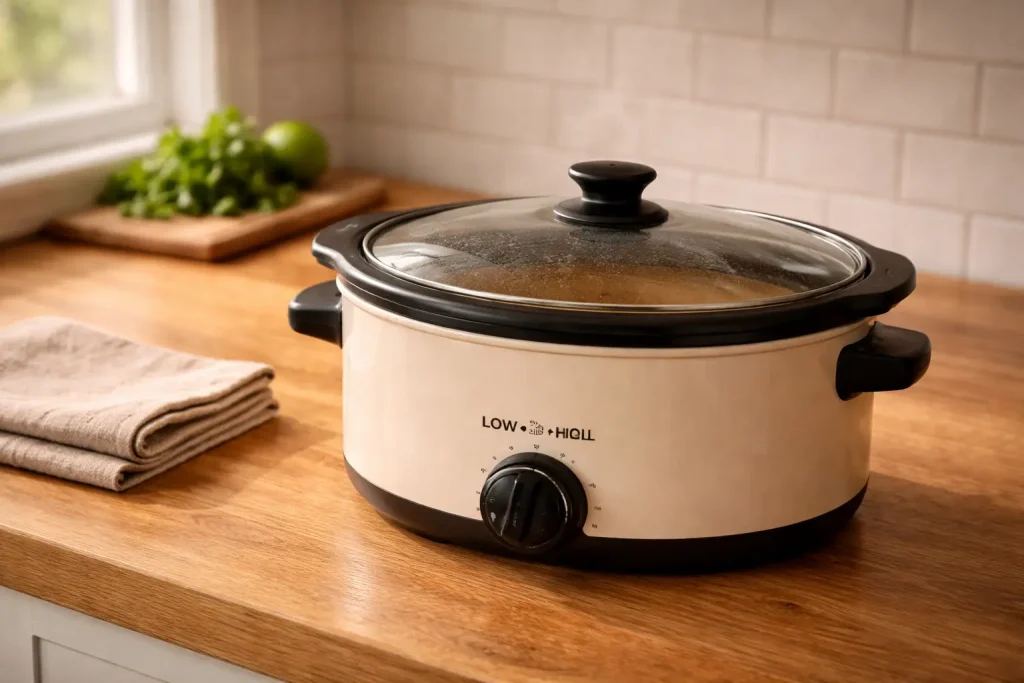
Stovetop Method (45–60 Minutes)
The classic. My personal favorite when I’m home and want to actually watch the magic happen.
There is something so deeply satisfying about a pot of beans quietly simmering on the stove, the broth slowly turning silky and cloudy, the whole kitchen filling with that warm, earthy smell. Yes, it takes the longest of the three methods. But it also gives you the most control and sometimes that matters.
What you need:
- 1 lb soaked, drained Anasazi beans
- 6 cups water or low-sodium broth (please, use broth the flavor difference is so worth it)
- 1 bay leaf
- Salt only after they’re done!
Here’s how to do it:
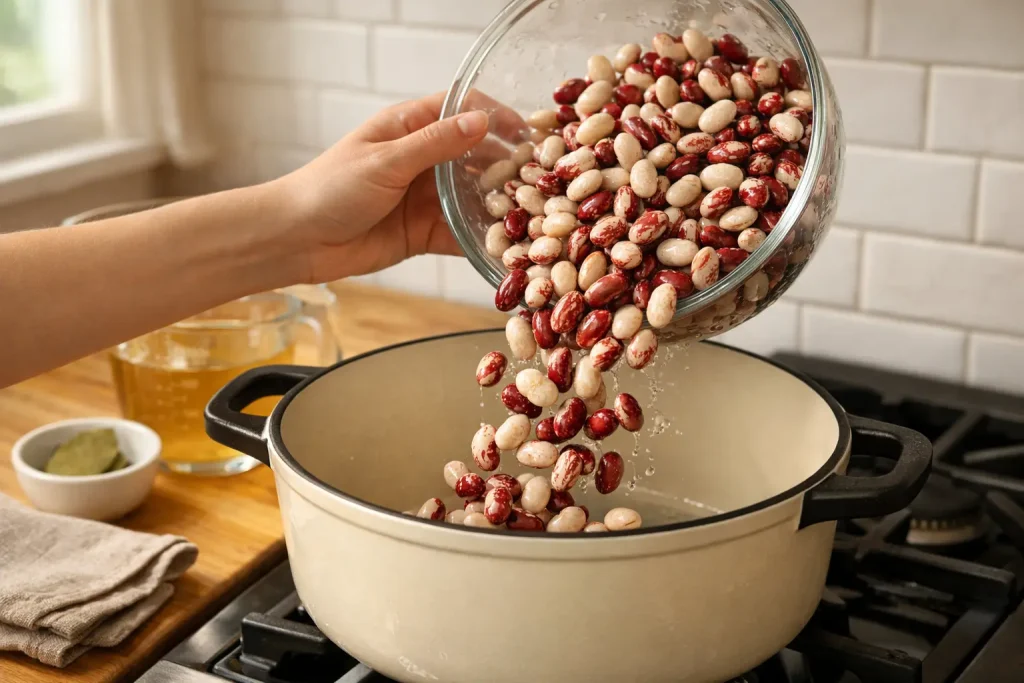
Start by adding your soaked, drained beans to a large, heavy-bottomed pot. A dutch oven works beautifully here because the thick walls distribute heat evenly and prevent any scorching on the bottom.
Pour in your water or broth and drop in the bay leaf.
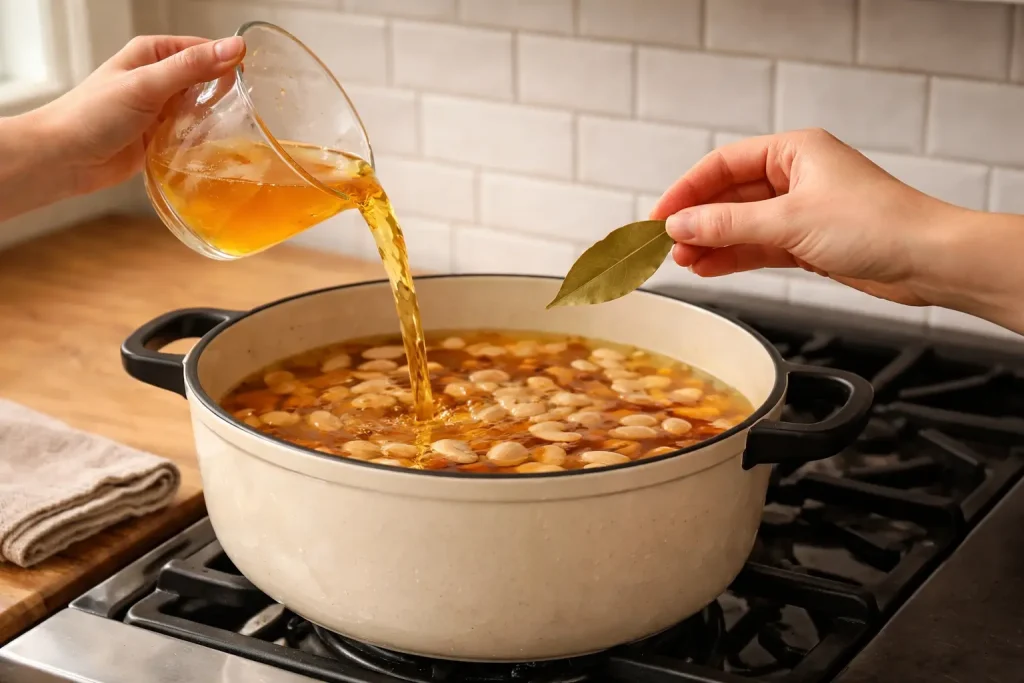
Bring everything to a full boil over high heat this initial boil is important. Then immediately reduce the heat down to a gentle, steady simmer.
And here’s something a lot of people get wrong: you want a simmer, not a rolling boil. Aggressive boiling breaks down bean skins, creates a lot of foam, and can result in mushy, blown-out beans with all that gorgeous creaminess dissolved into the water. A gentle simmer just a few lazy bubbles breaking the surface is exactly what produces that buttery, intact texture we’re going for.
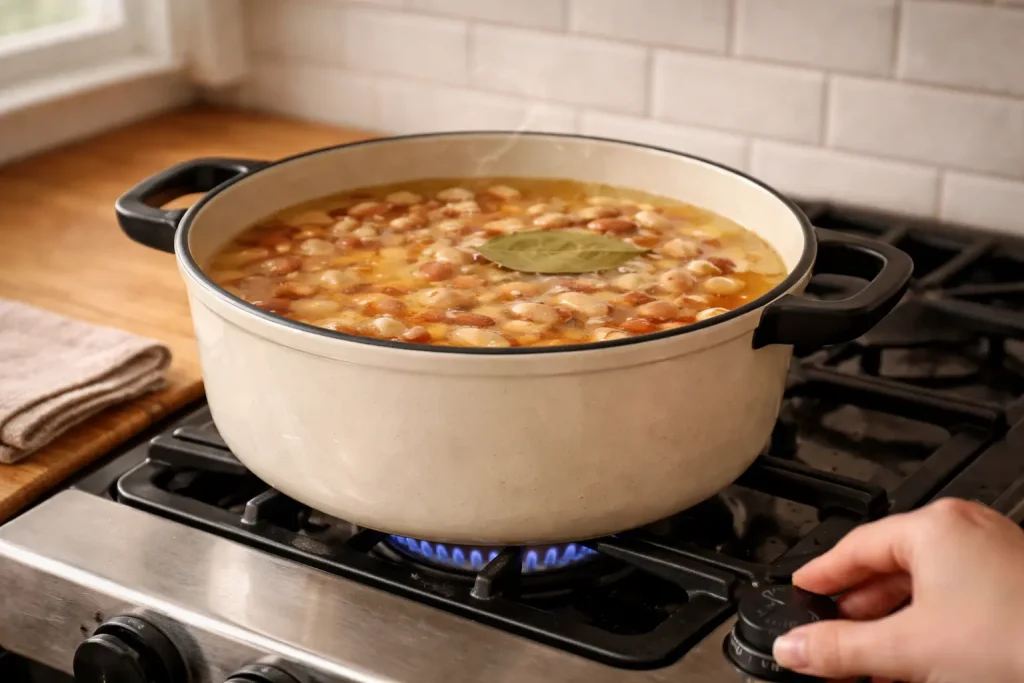
Cook uncovered, or partially covered if your stove runs hot, for 45–60 minutes for soaked beans. Stir gently every 15 minutes or so and check the water level add more warm water if the beans look like they’re getting exposed at the top.
How do you know when they’re done? Scoop out a single bean and press it between your fingers. It should give completely and feel soft and creamy all the way through with zero chalky, grainy resistance in the center.
Still a little firm at 60 minutes? Keep going in 10-minute increments. Bean cooking times vary depending on the age of your batch older beans take longer, and there’s no shortcut around that.
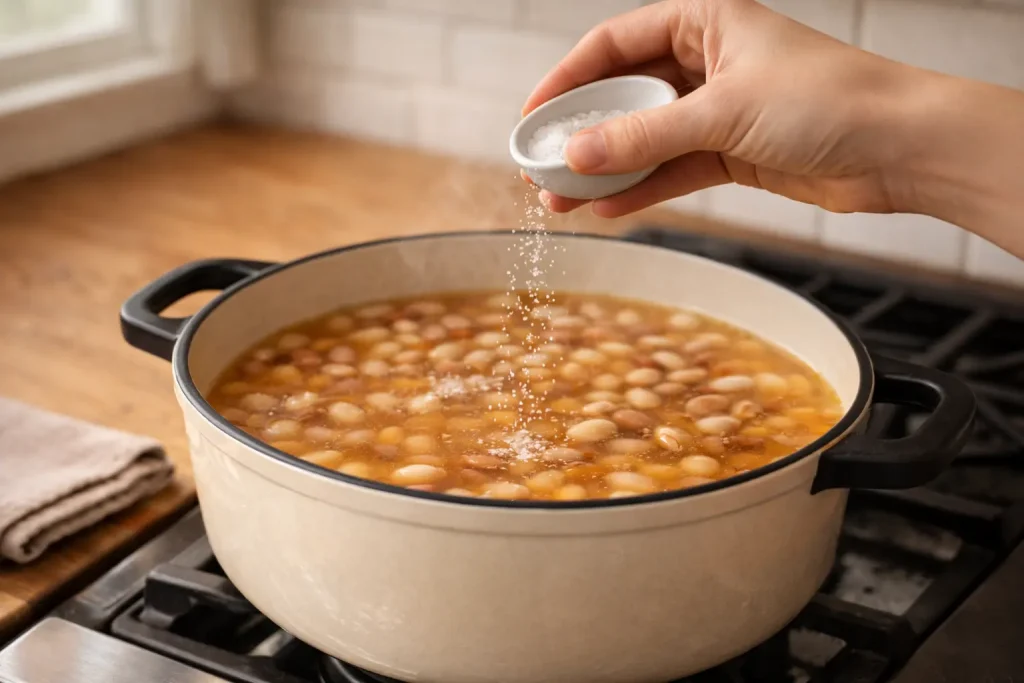
Once tender, season with salt and proceed with your recipe.
Pro tip from my kitchen: In the first 10 minutes of simmering, some foam will rise to the surface. Skim it off with a spoon. It keeps the cooking liquid cleaner and gives you a clearer, better-tasting broth to cook with.
Slow Cooker / Crockpot Method (6–8 Hours)
Honestly? This is the most relaxing way to cook beans in the entire world.
Start it in the morning, walk away, live your life, come home to a pot of perfectly cooked, meltingly soft, deeply flavored Anasazi beans sitting there waiting for you like a warm hug. I love this method so much, especially in fall and winter when I want the whole house to smell like something good is cooking.
The slow, gentle heat of a crockpot is also incredibly kind to the texture of Anasazi beans they stay beautifully intact while cooking to a deep, full creaminess that’s hard to replicate any other way.
What you need:
- 1 lb soaked, drained Anasazi beans
- 6 cups water or low-sodium broth
- 1 bay leaf
- 1 small yellow onion, halved (optional but adds so much flavor to the base broth)
- Salt only at the very end!
Here’s how to do it:
Add your soaked, drained beans to the slow cooker insert. Pour in your liquid and add the bay leaf and onion halves if using.

Give it a gentle stir. Put the lid on. Walk away.
Cook on LOW for 6–8 hours or on HIGH for 3–4 hours.
LOW and slow is my strong preference here. The gentle, unhurried heat gives the beans time to hydrate and soften evenly all the way through. HIGH heat works but can occasionally produce a slightly less consistent texture some beans softer than others, which can be a little frustrating.
Check them at the 6-hour mark on LOW or 3-hour mark on HIGH. You’re looking for that same completely tender, no-chalkiness test.
One thing to know: Slow cooker beans produce a gorgeous, thick, starchy cooking liquid much more concentrated than stovetop. Don’t drain it all away! That bean broth is pure liquid gold for soups, stews, and sauces. Save every drop.
Once tender, fish out the bay leaf and onion halves, season with salt, and your beans are ready.

My slow cooker tip: If you’re adding aromatics like garlic, whole spices, or dried chiles, add them at the very start they need the full cook time to properly infuse the beans. Fresh herbs and citrus, though, always go in at the very end.
Instant Pot / Pressure Cooker Method (20–25 Minutes)
The speed champion. The weeknight hero. The reason I don’t reach for canned beans anymore.
I genuinely love my Instant Pot for beans. It cuts the stovetop time by more than half, works beautifully with unsoaked beans when you need dinner in a hurry, and produces a pot of beans that is tender, flavorful, and absolutely reliable every single time.
The one thing I’ll say: pressure cooking is powerful, and the pressure release step matters more than people think. Rushing it can literally split the bean skins. More on that in a second.
What you need:
- 1 lb Anasazi beans, soaked or unsoaked (both work!)
- 6 cups water or low-sodium broth
- 1 bay leaf
- Salt after cooking, never before!
Liquid ratio matters here: Use 3 parts liquid to every 1 part beans. For 1 lb of dried beans (about 2 cups), 6 cups of liquid is exactly right for soaked beans. For unsoaked beans, I like to bump it up to 7 cups just to be safe unsoaked beans absorb more liquid during cooking.
One more critical note: Never fill your Instant Pot more than halfway when cooking beans. Beans expand significantly under pressure and the cooking liquid foams. Overfilling causes that foam to reach the pressure valve and clog it. Halfway full is the absolute maximum always.
Here’s how to do it:
Add your beans (soaked or unsoaked), liquid, and bay leaf to the Instant Pot inner pot.

Do not add salt yet.
Lock the lid. Make sure the sealing valve is set to Sealing not Venting. This is the step people forget and then wonder why their pot never came to pressure!
Select Pressure Cook (or Manual on older models) and set to HIGH pressure.
- Soaked beans: 20–25 minutes
- Unsoaked beans: 30–35 minutes
The Instant Pot will take about 10–15 minutes to build up pressure before the timer even starts counting down so factor that into your total time.

Once the cook time finishes, here’s the most important step: natural pressure release for at least 15 minutes.
Do not touch that valve for 15 minutes. I know it’s tempting. I know you’re hungry. Wait.
Here’s why: when pressure releases too fast, the liquid inside rapidly converts to steam and can literally blow the skins right off your beans leaving you with a pot of split, mushy beans instead of the beautiful, intact, creamy ones we’re after. A slow, natural release gives the beans time to finish cooking gently in the residual heat and keeps everything intact.
After 15 minutes, carefully switch the valve to Venting to release any remaining pressure. Once the float valve drops down completely, it’s safe to open the lid.

Check your beans for doneness. If they need a few more minutes, switch to the Sauté setting and simmer gently until perfect.
Season with salt, let them rest for 5–10 minutes in the liquid, and they’re ready.

My Instant Pot tip: After opening the lid, let the beans sit uncovered in their cooking liquid for about 10 minutes before serving. This resting time lets the flavors develop and deepen noticeably. It’s a small step that makes a real difference.
Quick Comparison: Which Method Should You Choose?
| Stovetop | Slow Cooker | Instant Pot | |
|---|---|---|---|
| Soaked cook time | 45–60 min | 6–8 hrs (LOW) | 20–25 min |
| Unsoaked cook time | 75–90 min | Not recommended | 30–35 min |
| Texture result | Creamy & intact | Meltingly soft | Firm-creamy & intact |
| Hands-on level | Medium | Very low | Low |
| Best for | Full control | Busy days | Speed & convenience |
My honest take? If I’m home and in the mood to cook, I go stovetop. If I’m meal prepping on a Sunday, I go slow cooker. If it’s a Tuesday night at 6pm and I forgot to plan ahead Instant Pot, always.
All three methods produce genuinely delicious Anasazi beans. You really can’t go wrong. Just pick the one that fits your day and trust the process. 😄
Signature Creamy Anasazi Beans (Modern Fusion Style)
Ingredients
Equipment
Method
- Soak your beans using the overnight cold soak (cover with 3 inches cold water, 8–12 hours) or the quick soak method (boil 2 minutes, rest 1 hour). Drain and rinse well before cooking.
- Add soaked, drained beans to a large heavy-bottomed Dutch oven with 6 cups of water or broth and the bay leaf. Bring to a full boil over high heat, then immediately reduce to a gentle, steady simmer.
- Cook uncovered for 45–60 minutes, stirring gently every 15 minutes. In the first 10 minutes, skim any white foam that rises to the surface this keeps your broth clean and clear. Do NOT add salt yet.
- Check doneness by squeezing a single bean between your fingers. It should feel completely soft and creamy with zero chalky resistance in the center. Still firm? Keep going in 10-minute increments.
- About 15 minutes before the beans are done, heat ghee in a heavy cast iron skillet over medium-high heat. Once shimmering, add cumin seeds. Let them sizzle and pop for 30 seconds until deeply fragrant and toasty. Don't walk away they burn fast!
- Add diced onion to the skillet. Cook over medium heat, stirring occasionally, until deeply golden and caramelized about 8–10 minutes. Do not rush this step. Those golden onions are the entire flavor foundation of this dish.
- Stir in minced garlic and grated ginger. Cook for 1 more minute until intensely fragrant.
- Reduce heat to medium-low. Add Kashmiri chili powder and ground coriander directly into the onion mixture. Stir constantly and toast for 30 seconds the mixture will darken and smell deeply aromatic. This "blooming" step is what makes the spices sing.
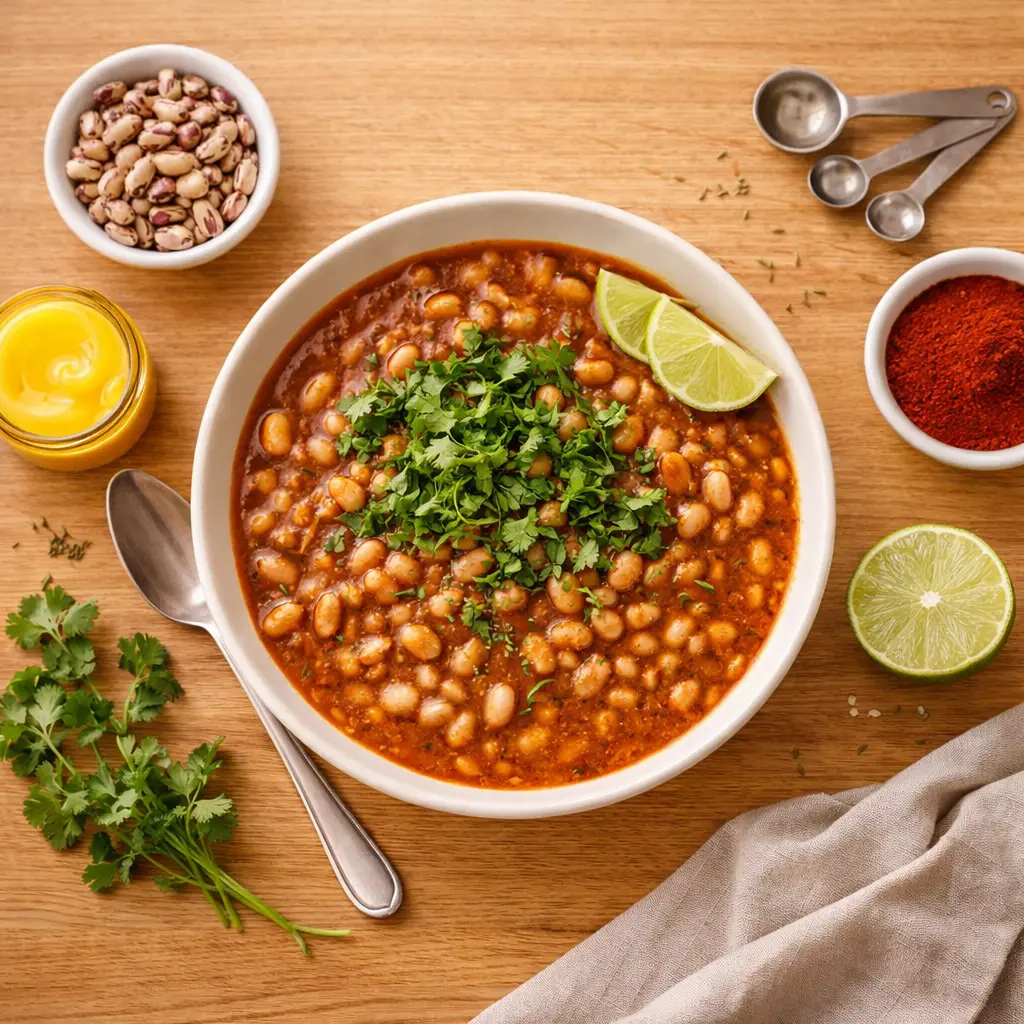
- Pour the entire spiced onion mixture directly into the pot of cooked beans. Stir well to combine. Add 1 tsp salt. Bring to a gentle simmer and cook together for 10 more minutes.
- Texture trick: use the back of a large spoon to lightly mash about ½ cup of beans against the side of the pot. This releases natural starch and transforms the broth into a thick, glossy, gravy-like sauce.
- Remove and discard the bay leaf. Squeeze generous fresh lime juice over the top. Garnish with plenty of fresh cilantro. Serve immediately with warm flatbread, steamed basmati rice, or crusty bread.