
")
If you’ve ever stood in front of an apple crisp, a caramel drizzled pie, and a buttery oat crumble bar and just wished they were all one thing congratulations. You’re already halfway to making these Caramel Apple Crunch Bars.
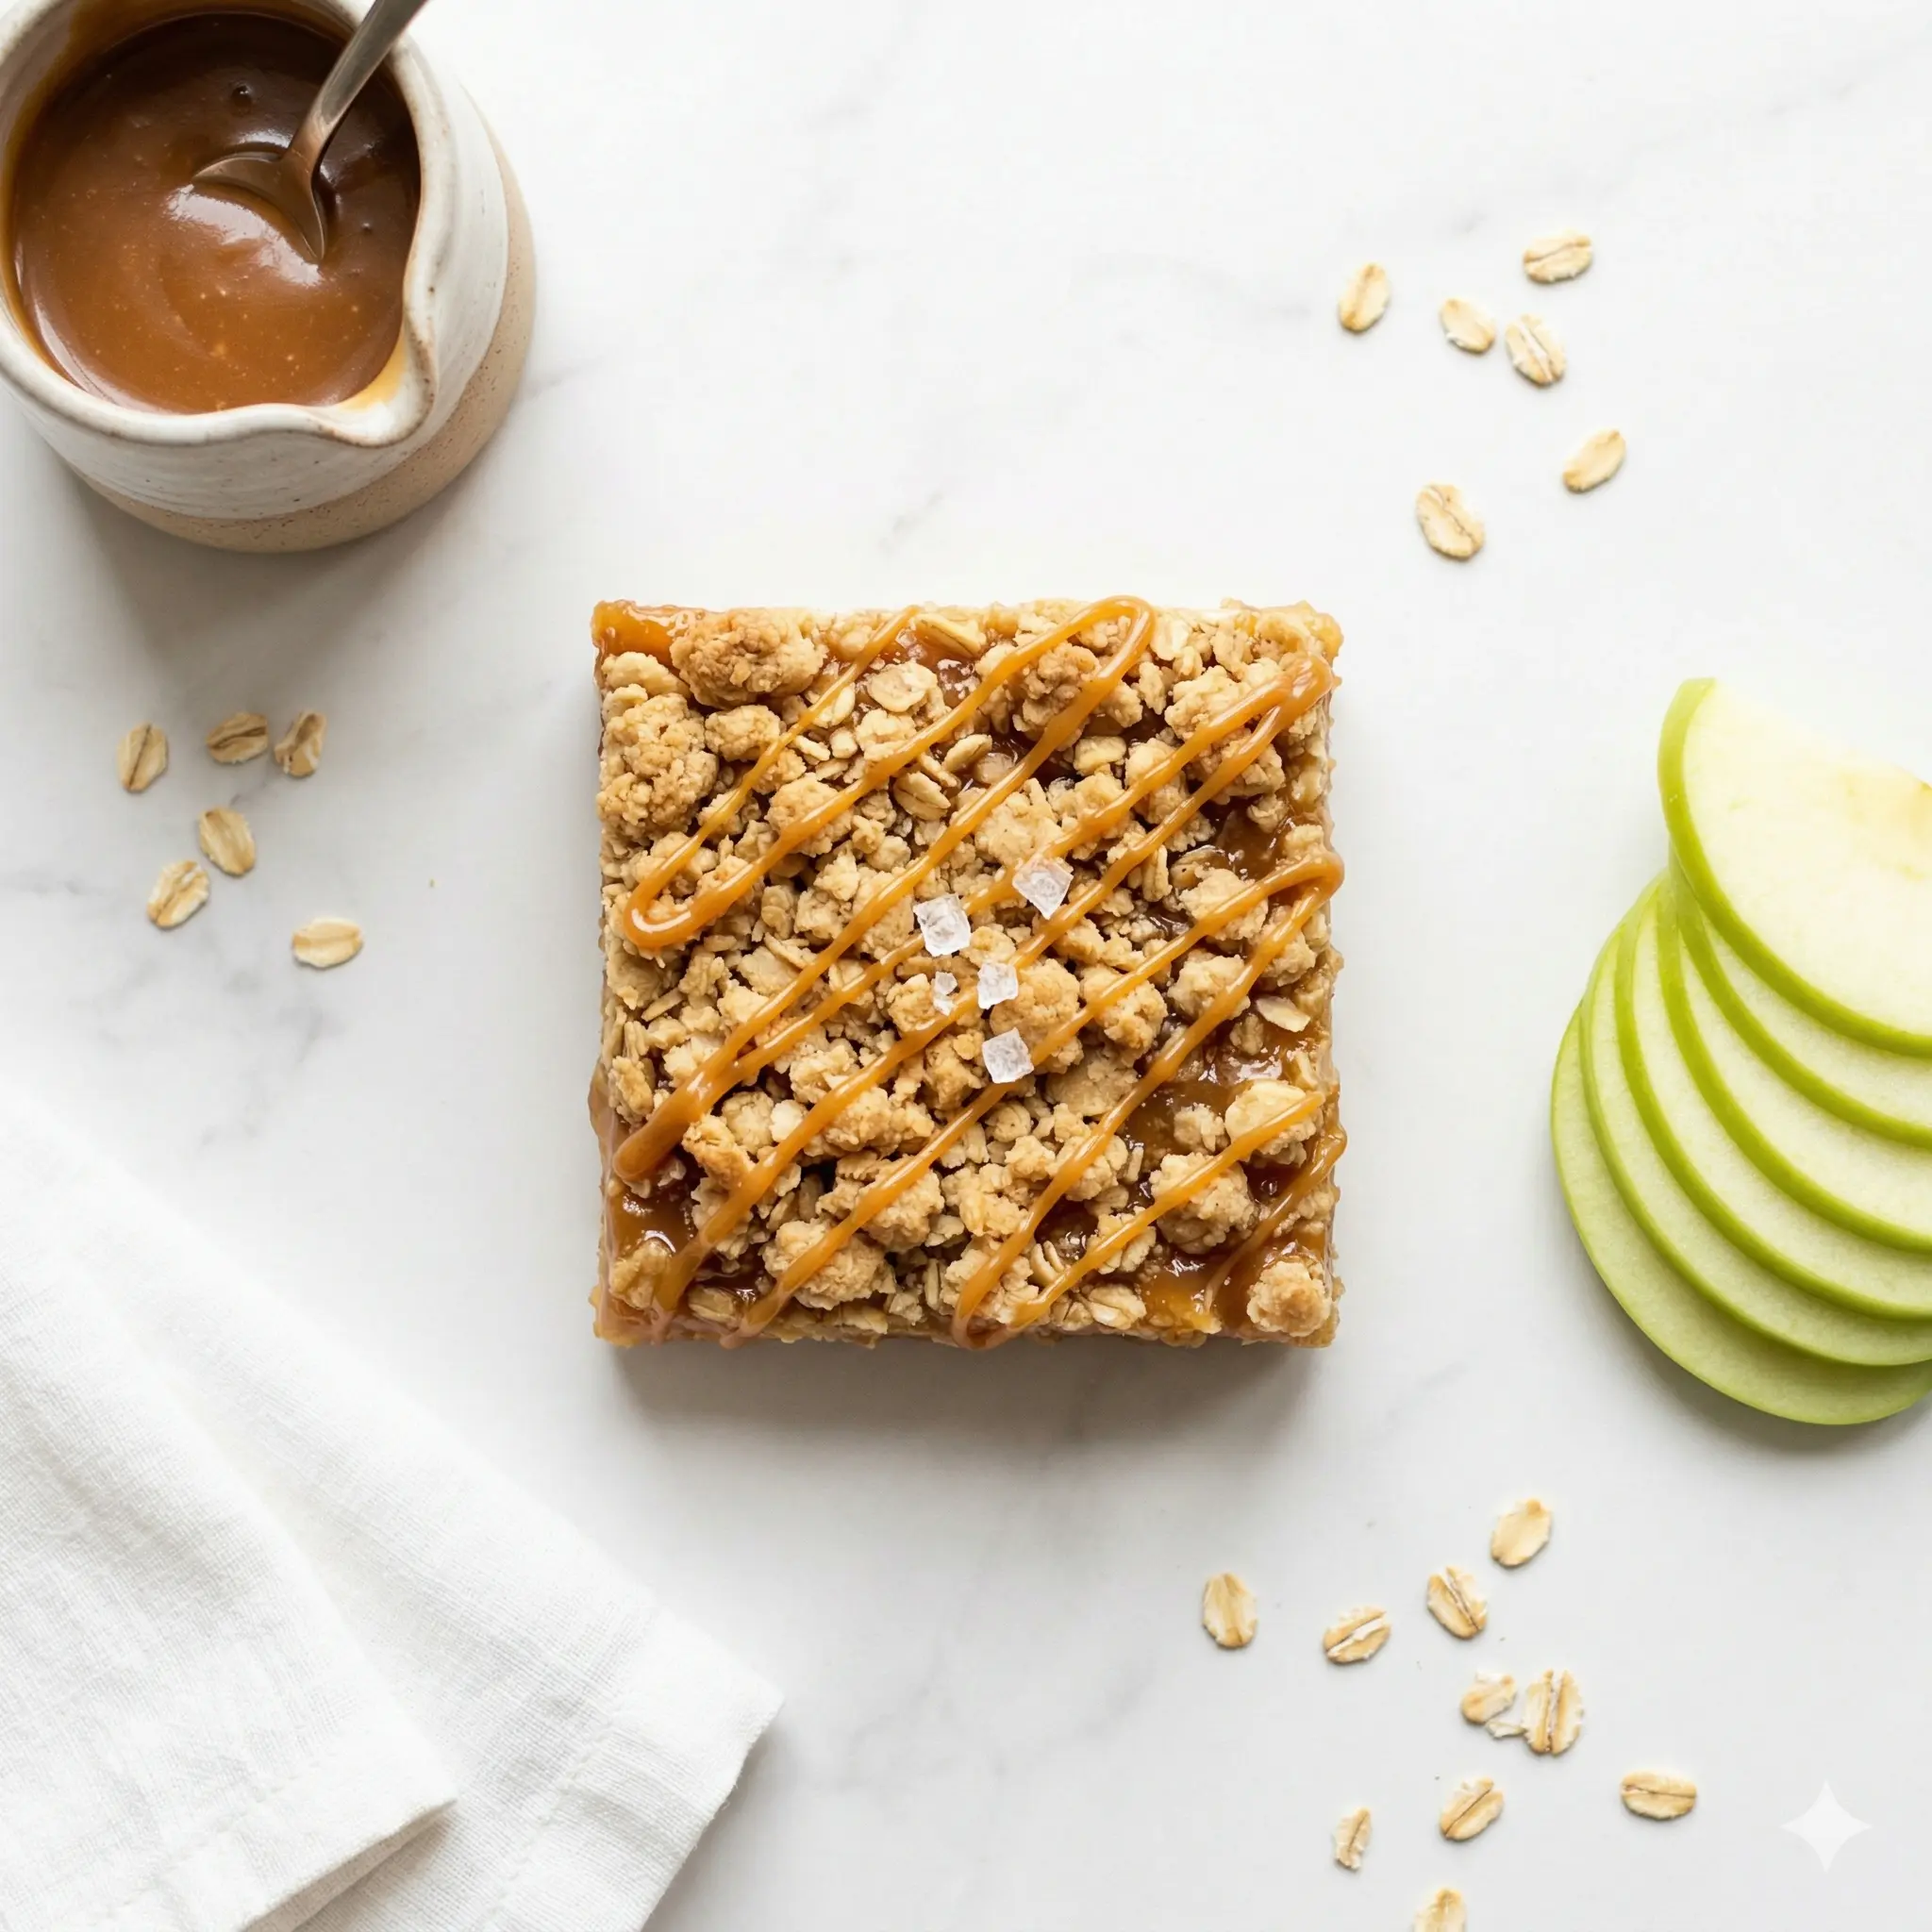
These bars have everything. A golden, buttery oat crust on the bottom. A soft, cinnamon-spiced apple filling in the middle. A generous pour of gooey caramel over the top. And then the best part that same crumbly oat mixture crumbled back on top so every single bite has that irresistible crunch.
I’m obsessed with them. My family is obsessed with them. And I’m pretty confident you will be too.
No mixer needed. One bowl. And they come together in about 20 minutes of actual hands-on time. Fall baking doesn’t get better than this.
Why You’ll Love This Caramel Apple Dessert
Let me count the ways:
- That texture contrast is everything. The oat crust bakes up golden and crisp on the bottom, the apple center goes soft and jammy, and the crumble topping stays delightfully crunchy. Every single layer is doing something different and together? Pure magic.
- It tastes like apple pie but takes half the effort. No rolling dough. No crimping edges. No stress. Just press, layer, and bake.
- One base, two purposes. The same oat mixture forms both your crust and your crumb topping. Less work, more reward.
- No mixer required. Just like my chocolate chip cookies, these bars come together with a bowl, a spatula, and your hands. That’s it.
- Perfect for fall gatherings, bake sales, or honestly a Tuesday night. They slice beautifully (once cooled more on that later!) and travel well too.
Ingredients for Caramel Apple Crunch Bars
Here’s everything you need and I promise you likely already have most of it in your pantry.
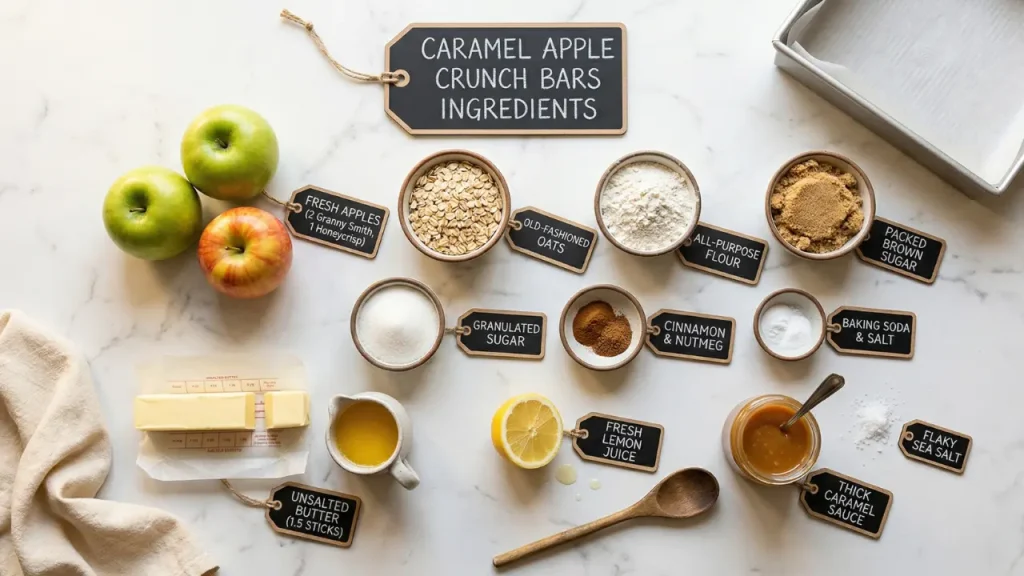
For the Oat Crust & Crumb Topping:
- 2 cups old-fashioned rolled oats
- 1½ cups all-purpose flour
- ¾ cup packed light brown sugar
- ½ teaspoon baking soda
- ½ teaspoon cinnamon
- ¼ teaspoon salt
- ¾ cup (1½ sticks) unsalted butter, melted
For the Apple Filling:
- 3 medium apples (about 3 cups), peeled, cored, and thinly sliced
- 2 tablespoons granulated sugar
- 1 tablespoon all-purpose flour
- 1 teaspoon cinnamon
- ¼ teaspoon nutmeg
- 1 teaspoon fresh lemon juice
For the Caramel Layer:
- ½ cup thick caramel sauce (store-bought or homemade)
- Flaky sea salt for finishing (optional but highly recommended!)
Important: Use a thick caramel sauce here not the thin squeeze-bottle variety. Thin caramel has too much liquid in it and will make your bars soggy. Look for a jarred, spoonable caramel sauce for the best results.
What Are the Best Apples for Baking?
Not all apples are created equal in the oven and this recipe really does taste better when you choose the right variety.
Granny Smith is my top pick. They’re firm, tart, and hold their shape beautifully during baking instead of turning to mush. That tartness also balances the sweetness of the caramel perfectly so you get complexity in every bite, not just sugar overload.
Honeycrisp is a close second. They’re a little sweeter with a slightly softer texture after baking absolutely delicious if you prefer a milder, less tart filling.
The best move? Use both. Half Granny Smith, half Honeycrisp. You get the tartness AND the sweetness, and the texture of the filling becomes so much more interesting.
What to avoid: Red Delicious and McIntosh apples go too soft and watery when baked. Skip them here.
Step-by-Step Instructions: How to Make the Bars
1. Making the Oat Crust and Crumb Topping
Preheat your oven to 350°F (177°C). Line an 8×8 inch square baking pan with parchment paper, leaving some overhang on the sides this makes lifting the bars out SO much easier later.
In a large mixing bowl, combine the oats, flour, brown sugar, baking soda, cinnamon, and salt. Stir to combine. Pour in the melted butter and mix until everything comes together into a crumbly, clumpy mixture. It should feel like wet sand that clumps when pressed.
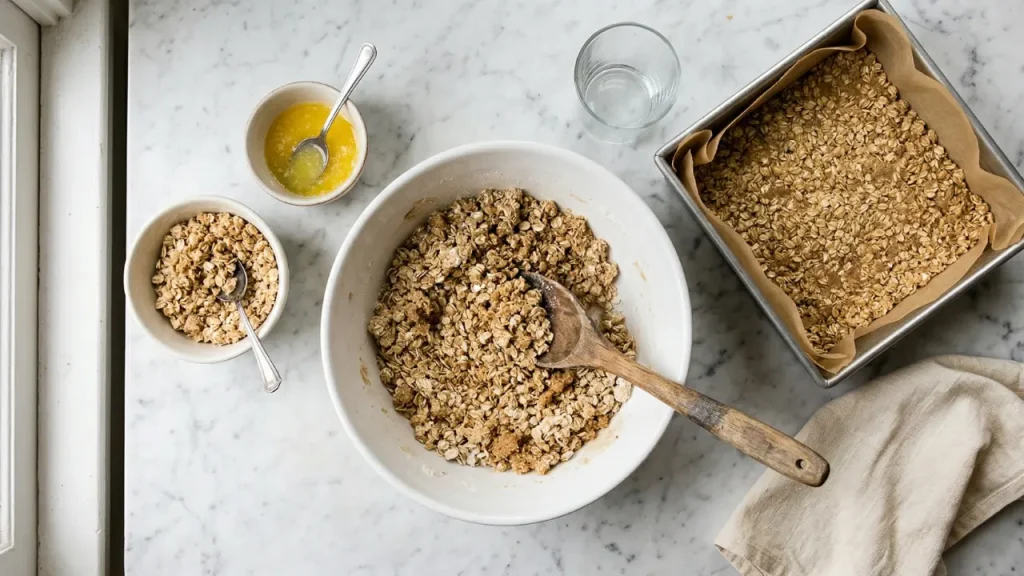
Here’s the one-bowl magic: set aside about 1 cup of this mixture for your crumb topping. Press the remaining mixture firmly into the bottom of your prepared pan really press it in there! Use the bottom of a flat glass to get an even, compact layer.
Tip: Don’t be shy when pressing that crust. A firmly packed base holds up against the wet apple filling. A loosely packed base turns into crumble soup. Been there. Done that.
Pre-bake the crust for 12 minutes until it just starts to turn golden at the edges. Set aside.
2. Assembling the Apple and Caramel Layers
While the crust is pre-baking, prep your apple filling. In a bowl, toss your thinly sliced apples with the sugar, flour, cinnamon, nutmeg, and lemon juice until every slice is coated. The flour is key here it soaks up the juices the apples release during baking so your bars don’t end up soupy.
Layer the apple filling evenly over your warm pre-baked crust.
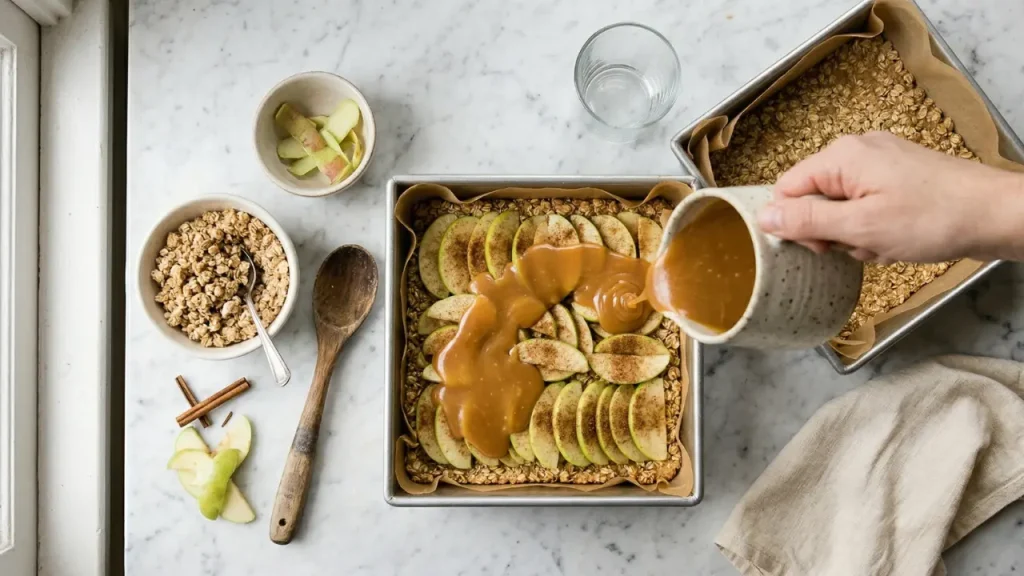
Now the best part drizzle the caramel sauce generously over the apple layer. Don’t be shy. This is not the time for moderation.
Sprinkle the reserved oat crumble mixture over the top, pressing it very lightly into the caramel so it sticks. If you want extra texture, form a few larger clumps with your fingers those bake up into gorgeous golden nuggets on top.
3. Baking to Golden Perfection
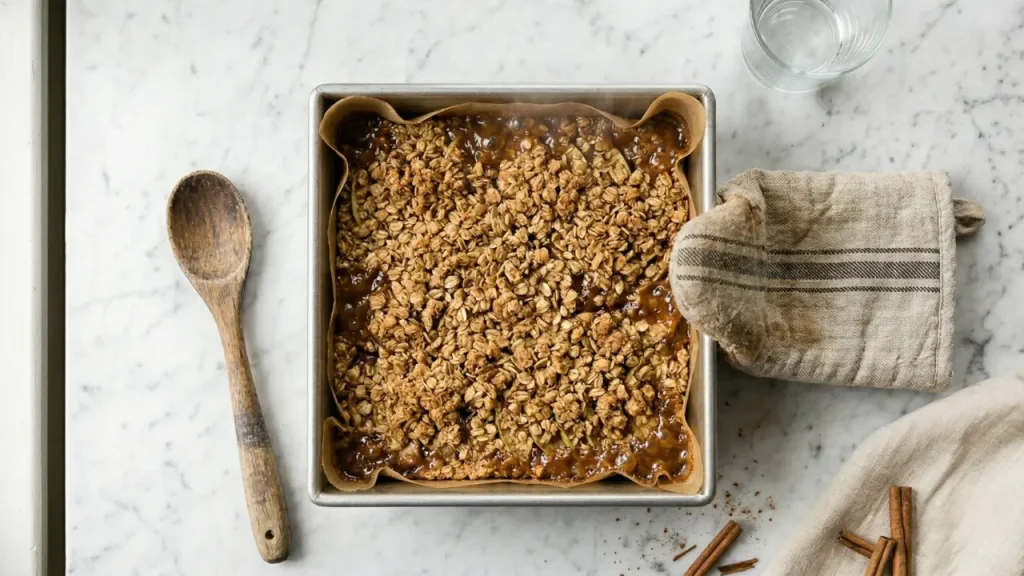
Bake at 350°F for 35–40 minutes, until the crumb topping is deep golden brown and you can see the caramel apple filling bubbling up around the edges. That bubbling is your green light it means the filling is hot, jammy, and perfect.
Remove from the oven and immediately sprinkle with a pinch of flaky sea salt if using.
Now here comes the hardest part of this entire recipe: let them cool completely before cutting. I know. I KNOW. The smell coming from your kitchen is going to be outrageous. But if you cut into them while they’re hot, they’ll fall apart into a delicious but messy pile. Give them at least 1–2 hours at room temperature, or pop them in the fridge for 30–45 minutes to speed things up.
Once cooled, use the parchment paper overhang to lift the whole slab out of the pan. Place on a cutting board and slice into 9 big squares or 16 smaller bars.
Expert Tips for the Best Crunch Bars
These are the things I wish someone had told me the first time I made these:
- Don’t over-microwave your caramel. If you’re warming store-bought caramel to make it pourable, microwave it in 15-second bursts and stir between each. Over-heated caramel gets too runny and will make your bars soggy. Warm and pourable not hot and liquid is exactly what you want.
- Slice your apples thin. About ⅛ to ¼ inch thick. Thick apple chunks don’t soften fully by the time the crust is done baking, and you end up with crunchy apple pieces instead of that soft, jammy layer we’re after.
- That lemon juice matters. Beyond flavor, the acid in lemon juice keeps your apple slices from browning while you assemble everything. It also brightens up the filling beautifully.
- Cold bars = clean cuts. The colder these bars are when you slice them, the cleaner your cuts will be. I usually make them the night before, refrigerate overnight, and slice in the morning. They’re genuinely even better the next day once everything has had time to settle and meld together.
- Want extra crunch on top? Stir a handful of chopped pecans or walnuts into your reserved crumble topping before sprinkling. It adds a nutty, toasty layer that takes these bars to full bakery status.
How to Store and Reheat
- At room temperature: Store covered tightly for up to 2 days. Keep in mind that the crumb topping will soften slightly over time still delicious, just less crunchy.
- In the refrigerator: This is my preferred method. Store in an airtight container for up to 5 days. The bars firm up nicely and slice even cleaner straight from the fridge.
- In the freezer: Yes, these freeze beautifully! Wrap individual bars in plastic wrap, place in a freezer-safe bag, and freeze for up to 3 months. Thaw overnight in the fridge or at room temperature for a couple of hours.
- To reheat: Pop a bar in the microwave for 20–30 seconds. The caramel gets gooey again and the whole thing tastes freshly baked. Serve with a scoop of vanilla ice cream for maximum happiness.
Caramel Apple Crunch Bars
Ingredients
Equipment
Method
- Preheat & Prep:- Preheat oven to 350°F (177°C). Line an 8×8 inch baking pan with parchment paper, leaving an overhang on two sides for easy removal. Set aside.
- Make the Oat Base:-In a large bowl, whisk together oats, flour, brown sugar, baking soda, cinnamon, and salt. Pour in the melted butter and stir until the mixture is evenly crumbly and clumps when pressed. Reserve 1 cup of this mixture for the crumb topping. Press the remaining mixture firmly into the bottom of your prepared pan using your hands or the flat bottom of a glass.
- Pre-Bake the Crust:- Bake the crust for 12 minutes until edges just begin to turn golden. Remove from oven and set aside. Keep the oven on at 350°F.
- Make the Apple Filling:- While the crust pre-bakes, toss the thinly sliced apples with sugar, flour, cinnamon, nutmeg, and lemon juice in a medium bowl until every slice is well coated.
- Assemble the Layers:- Spread the apple filling evenly over the warm pre-baked crust. Drizzle the caramel sauce generously and evenly over the apple layer. Sprinkle the reserved oat crumble over the top and press very lightly so it adheres to the caramel. Use your fingers to form a few larger clumps for extra crunchy texture on top.
- Bake:- Bake for 35–40 minutes until the crumb topping is deep golden brown and the caramel apple filling is visibly bubbling around the edges.
- Cool & Slice:- Place pan on a wire rack. Cool completely for at least 1–2 hours at room temperature, or 30–45 minutes in the fridge. Once fully cooled, lift out using parchment paper overhang. Slice into 9 large bars or 16 smaller squares. Sprinkle with flaky sea salt before serving if desired.
Nutrition
Notes
Tried this recipe?
Let us know how it was!FAQs
Q1. Can I use store-bought caramel sauce?
Absolutely! Just make sure it’s a thick, good-quality jarred sauce not the thin squeeze-bottle variety. Thin caramel has too much water and will make your filling soupy. Thick caramel = gooey, perfect bars.
Q2. Can I make these ahead of time?
Yes and honestly, I recommend it. Make them the day before, refrigerate overnight, and slice the next morning. The flavors deepen and the bars hold their shape even better.
Q3. My bars fell apart when I cut them. What went wrong?
Almost always, this means they weren’t cool enough when sliced. I know it’s hard to wait, but this recipe really does need full cooling time or a stint in the fridge before cutting. Also double-check that your crust was pressed firmly enough into the pan before baking.
Q4. Can I double the recipe?
Yes! Use a 9×13 inch pan and increase baking time to about 40–45 minutes, keeping an eye on the color of that crumb topping.
Q5. Can I make these gluten-free?
You can substitute a 1:1 gluten-free all-purpose flour blend. Make sure your oats are certified gluten-free as well.
Q6. What can I serve with caramel apple crunch bars?
They’re incredible on their own, but if you want to go full dessert mode a scoop of vanilla ice cream and an extra drizzle of caramel sauce. You’re welcome.
Final Notes
- The Cooling Period is Key: Avoid cutting the bars while they are still heated by allowing them to cool down. In order to prevent the bars from becoming a crumbly, mushy mass that is challenging to serve, the caramel coating must cool and firm.
- Spice It Up: A sprinkle of powdered nutmeg or allspice can be added to the apple filling mixture to offer an additional layer of flavour.
- Suggestion for Serving: These Caramel apple crunch bars taste great at room temperature, but for a really rich treat, serve them warm with a dollop of vanilla bean ice cream and more caramel sauce.