
")
With over 50 batches tested since discovering this method in 2019, I can confidently say that making sticky rice in a rice cooker is THE easiest way to get perfectly chewy, glossy results without the overnight soak. No bamboo steamer, no soaking for hours, and definitely no mushy rice disasters.
I’m sharing two foolproof methods today: the ultra-quick no-soak version (ready in 30 minutes!) and my preferred short-soak method that gives you that bakery-style texture. Both use simple ratios that work every single time.
And here’s the kicker: you don’t actually need to soak sticky rice overnight like everyone says. That “10-minute rest” after cooking? THAT’S the real secret that changes everything.
The Secret is the Rice: Glutinous vs. Regular
Here’s something super important that will save you from a kitchen disaster: sticky rice is a completely different grain from regular rice. I’m talking about a specific type of rice called glutinous rice (also called sweet rice or Thai sticky rice).
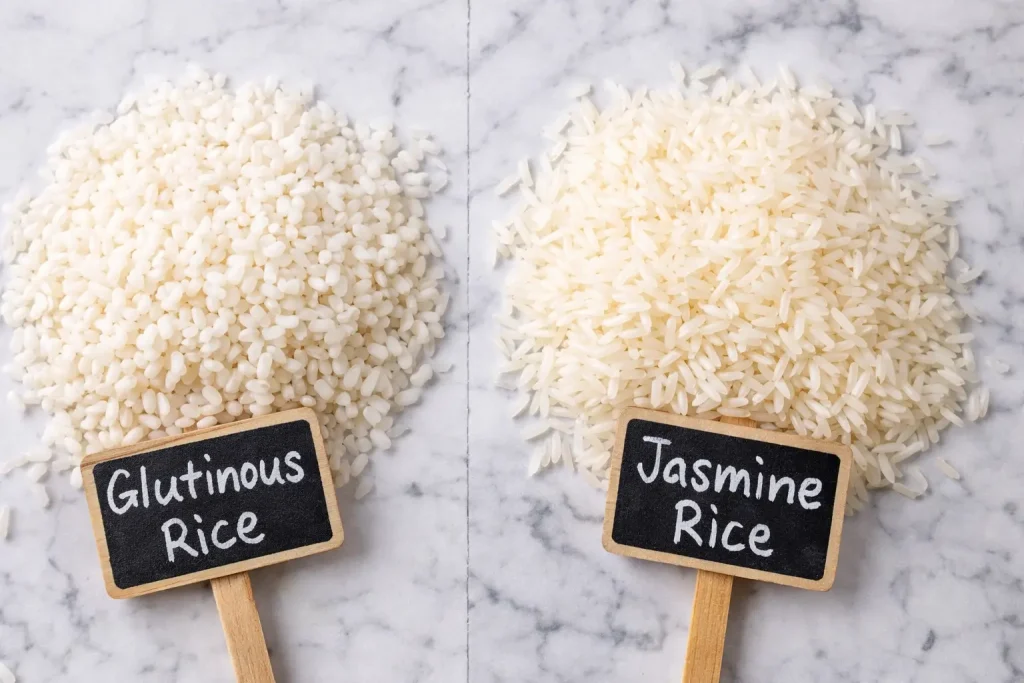
You CANNOT make sticky rice with jasmine rice, sushi rice, or any regular white rice. It just won’t work with this method, trust me. I learned this the hard way when I tried using leftover jasmine rice and ended up with a mushy, non-sticky mess.
Why the difference matters: Sticky rice contains almost zero amylose starch and is packed with amylopectin instead. That’s the science-y way of saying it has a completely different starch structure that makes it naturally stick together when cooked. Regular rice? It has both starches, which is why the grains stay separate and fluffy.
Look for packages labeled “glutinous rice,” “sweet rice,” “Thai sticky rice,” or “mochi rice” at your grocery store. You’ll usually find it in the Asian foods aisle or at any Asian market. Despite the name “glutinous,” it’s 100% gluten-free!
The Golden Ratios (Your New Best Friend)
After testing batch after batch, here are the two ratios that work perfectly every time:
Method A: No-Soak (The 30-Minute Hack)
Rice to Water Ratio: 1 : 1.25
- 1 cup glutinous rice
- 1¼ cups water
- Total time: About 30-35 minutes
Use this when you forgot to plan ahead or need sticky rice ASAP. The extra water compensates for the lack of soaking time.
Method B: Short-Soak (Best Texture)
Rice to Water Ratio: 1 : 1
- 1 cup glutinous rice
- 1 cup water
- 30-minute soak time
- Total time: About 60 minutes
This is my go-to method. That brief 30-minute soak softens the outer shell of the rice just enough to give you those perfectly chewy, separate-but-sticky grains. The texture is noticeably better than the no-soak method.
Ingredient List
Super simple! Here’s what you need for 2-3 servings:
- 1½ cups (330g) glutinous rice (also called Thai sticky rice or sweet rice)
- 1½ cups (360ml) water (for no-soak method, use 1⅞ cups/450ml)
- ¼ teaspoon salt (this is the pro secret!)
- Optional: 1 teaspoon neutral oil for extra glossy grains
Why salt? Most recipes skip this, but a tiny pinch of salt enhances the natural sweetness of the rice and balances the flavor. It’s subtle but makes a difference!
Step-by-Step Instructions
Step 1: Rinse Until Clear (The 3-Rinse Rule)
Place your sticky rice in a fine-mesh strainer or directly in your rice cooker bowl. Rinse under cold running water, swishing the rice around with your hands.
The water will look super cloudy at first that’s the surface starch washing off. Keep rinsing and draining until the water runs mostly clear. This usually takes 3-4 rinses.
Why this matters: Rinsing removes excess surface starch that can make your rice gummy or clumpy. You want sticky rice, not gluey rice!
Step 2: Soak (if using Method B)
If you’re using the short-soak method, cover the rinsed rice with fresh water and let it sit for 30 minutes. Set a timer! After 30 minutes, drain completely.
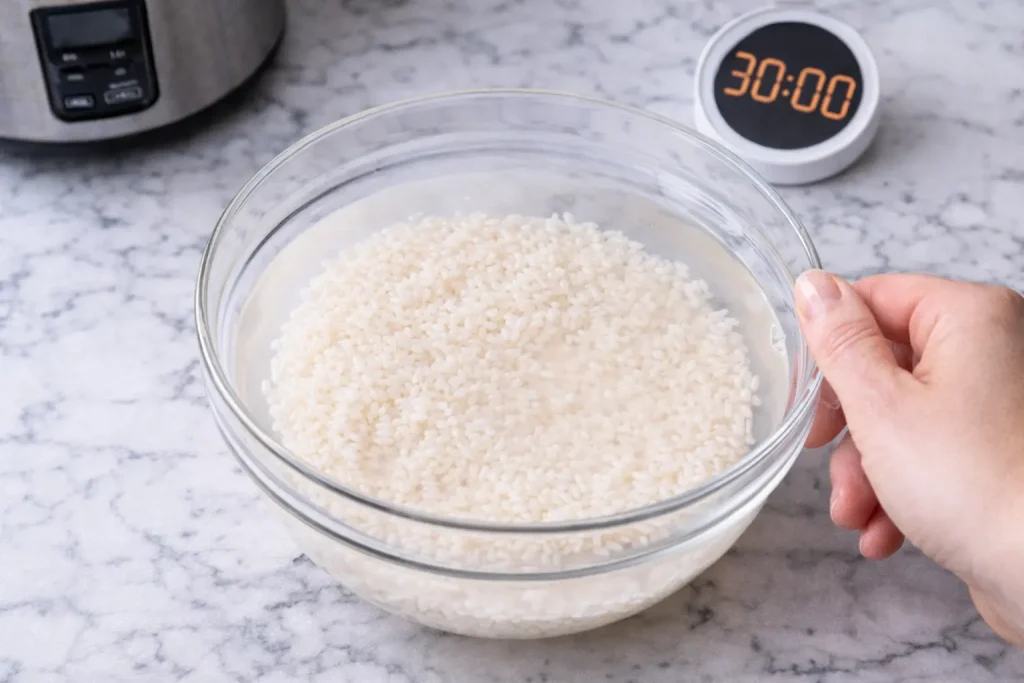
Skip this step if you’re doing the no-soak method.
Step 3: Add Water & Salt
Transfer your rinsed (and drained if soaked) rice to the rice cooker bowl. Add the correct amount of water based on which method you’re using:
- No-soak: 1.25x the rice amount
- Short-soak: Equal amount (1:1 ratio)
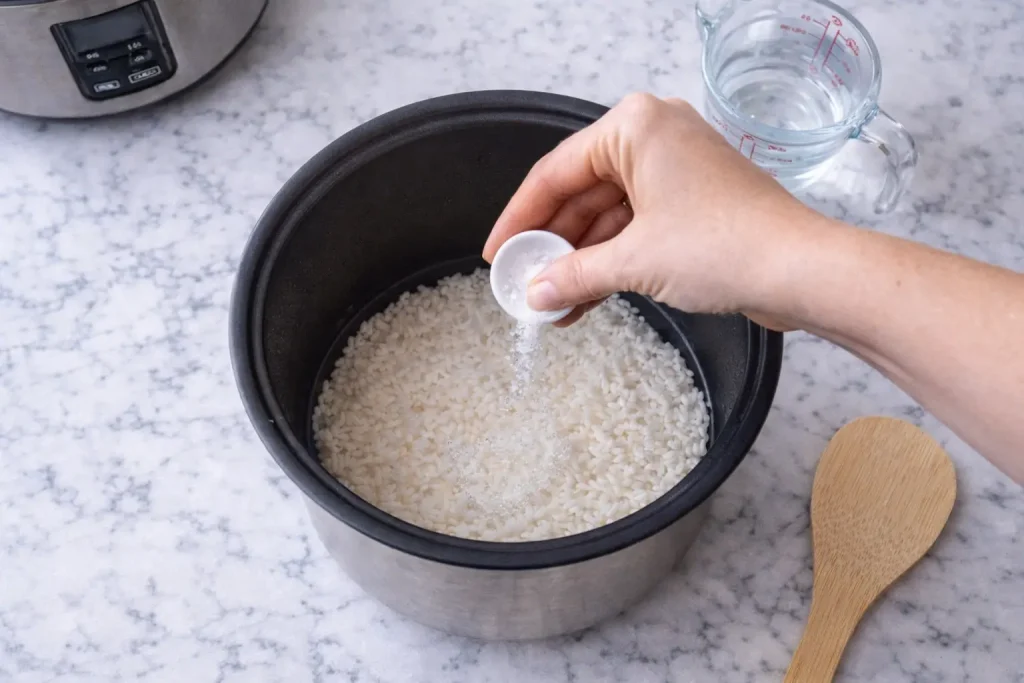
Sprinkle in your salt and give it a quick stir. Then use your hand or a spoon to level the rice so it’s flat and even across the bottom. This helps everything cook uniformly.
Pro tip: Some rice cooker measuring cups are different from standard US cups. When in doubt, use weight or measure both rice and water with the same cup.
Step 4: The Rice Cooker Setting
Here’s the thing: not all rice cookers are created equal. If your rice cooker has a “Sweet Rice” or “Glutinous Rice” setting, use that. It usually adjusts the cooking time to around 40-50 minutes.
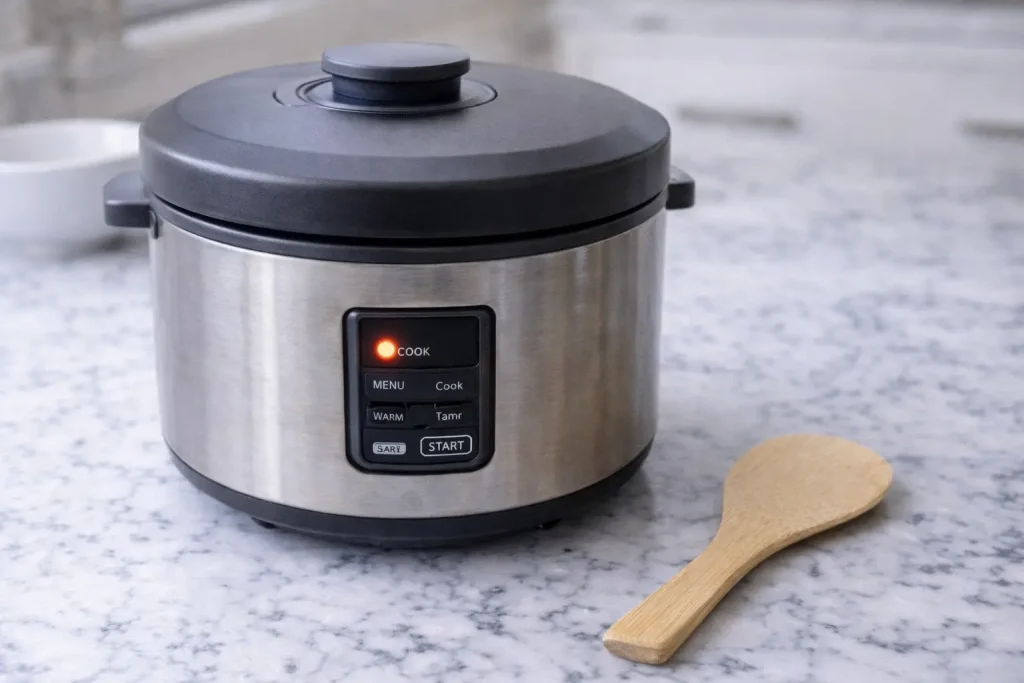
If you only have a basic “White Rice” setting, that works perfectly fine too! It typically takes 20-30 minutes. Just hit cook and walk away.
Step 5: The 10-Minute Rest (CRUCIAL!)
This is the game-changer that most people miss: When your rice cooker switches to “warm” or beeps that it’s done, DO NOT open the lid yet.
Let it sit undisturbed for 10 minutes. I’m serious about this set a timer!
Why this step is non-negotiable: During this rest time, the rice is finishing its cooking process with residual steam. The moisture redistributes evenly through all the grains. Opening the lid early releases that steam and ruins the texture, leaving you with partly undercooked, partly mushy rice.
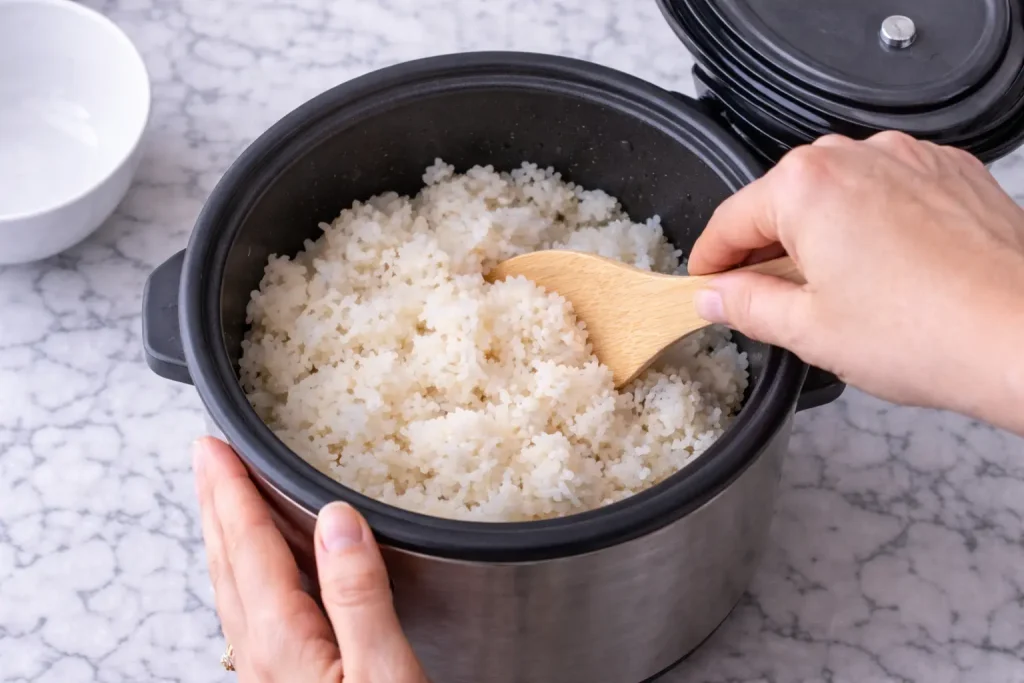
After 10 minutes, open the lid and use a rice paddle to gently fluff the rice from bottom to top. Let it sit with the lid off for 2-3 minutes to release any excess moisture.
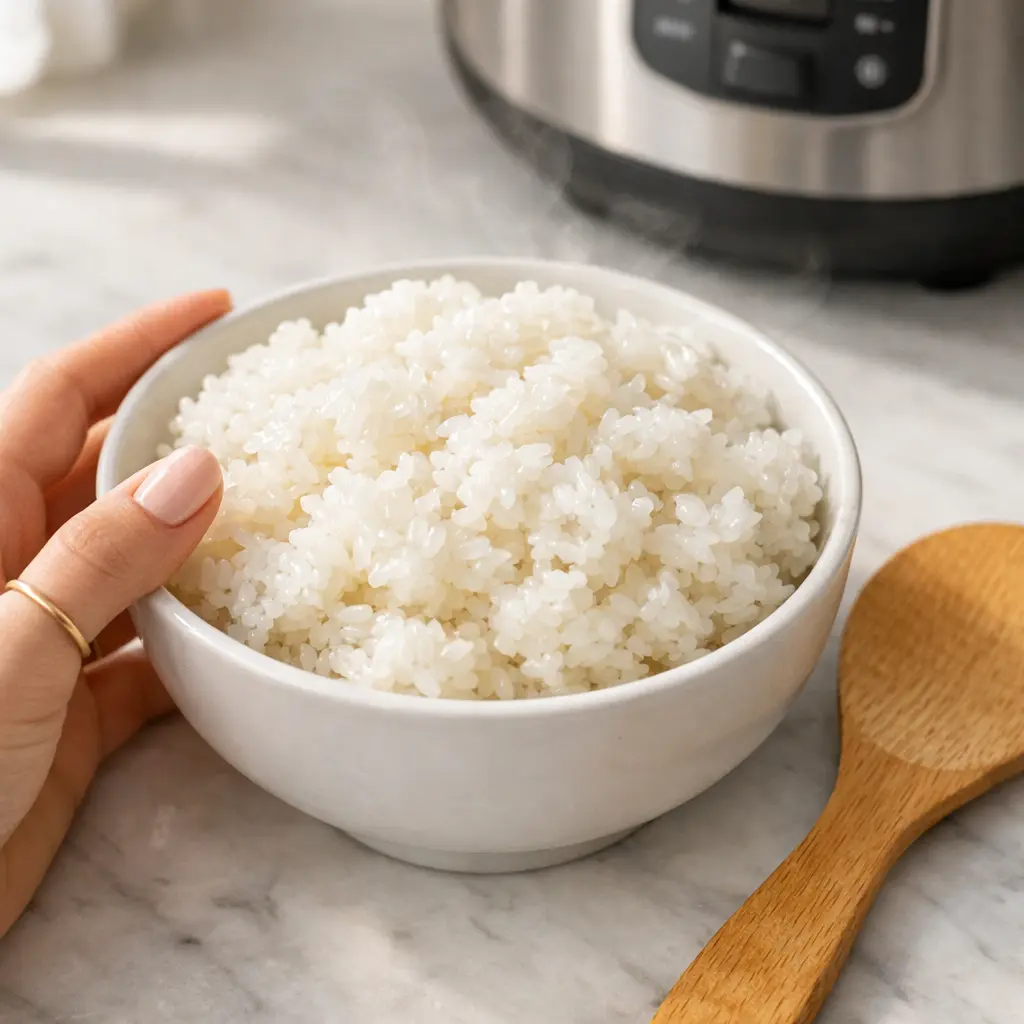
Your sticky rice should be glossy, tender, and perfectly chewy!
Expert Tips for the Best Texture
- Don’t skip the rinse. I know I already said this, but it’s that important. Unwashed sticky rice turns gummy.
- Level your rice before cooking. Unlevel rice means some grains are submerged while others are exposed, leading to uneven cooking.
- Measure accurately. The water ratio is critical with sticky rice. Too much = mushy. Too little = hard and crunchy.
- Serve it fresh. Sticky rice is best within 2-3 hours of cooking. The texture changes as it cools and can become tough.
- Add coconut milk for desserts. If making mango sticky rice or another sweet dish, replace half the water with coconut milk for incredibly creamy results.
- Maximum 2 cups of rice. Don’t cook more than 2 cups of uncooked sticky rice at once in most standard rice cookers. It won’t cook evenly.
Troubleshooting: Why is my rice mushy or hard?
Problem: Rice is mushy or gummy
- You used too much water. Stick precisely to the ratios.
- You didn’t rinse the rice enough. That excess surface starch made it gluey.
- You might have used regular rice instead of glutinous rice.
Problem: Rice is hard or undercooked
- Not enough water. Double-check your measurements.
- You opened the lid during cooking or skipped the 10-minute rest.
- Your rice cooker might run cooler. Try adding 2-3 tablespoons more water next time.
Problem: Rice is unevenly cooked
- The rice wasn’t level before cooking.
- You’re cooking too much rice at once (over 2 cups).
Perfect Rice Cooker Sticky Rice
Ingredients
Equipment
Method
- Rinse rice in cold water 3-4 times until water runs mostly clear. Drain well.
- Optional: Soak drained rice in fresh water for 30 minutes. Drain completely before proceeding.
- Add rice to rice cooker bowl. Add water (1.25x rice amount if not soaked, or equal amount if soaked). Add salt and optional oil.
- Level rice with your hand or spoon so it’s flat.
- Close lid and cook on White Rice or Sweet Rice setting until rice cooker signals done (20-50 minutes depending on your machine).
- Do not open lid! Let rest for 10 minutes.
- After 10 minutes, open lid and fluff rice with paddle. Let sit 2-3 minutes with lid off to release excess moisture.
- Serve warm and enjoy!
Nutrition
Notes
Tried this recipe?
Let us know how it was!FAQs About Rice Cooker Sticky Rice
Q1: Can I use jasmine or sushi rice instead?
No! Sticky rice is a completely different grain with a unique starch composition. Jasmine and sushi rice won’t give you the same chewy, sticky texture even if you cook them the same way.
Q2: Do I really need to soak the rice?
Nope! The no-soak method works great when you’re short on time. The short-soak method gives slightly better texture, but both work.
Q3: What’s the difference between sticky rice and sushi rice?
Both are short-grain and somewhat sticky, but sushi rice (Japanese short-grain) has moderate stickiness and separate grains. Sticky rice has almost zero amylose starch, making it clump together in a chewy mass.
Q4: Can I freeze cooked sticky rice?
Yes! Portion it into serving sizes, freeze in airtight containers for up to 2 months. Reheat from frozen with a splash of water in the microwave.
There you have it perfectly chewy, gloriously sticky rice from your rice cooker with minimal effort! Once you master these ratios, you’ll never go back to the complicated steaming method.
Let me know in the comments which method you tried and how it turned out!